
My first website was a part of my undergrad thesis, back in 2011. I used PHP and Perl for coding and WAMP for hosting. After I left, my project was heavily modified and incorporated into a webserver called TFTX. Credit is due to Aukash Kumar (my partner in crime) who carried out a big part of the analyses.
My motivation for a website is different this time though, with the key question being – what do I want to convey using my website? The answer is simple – I want to blog about machine learning, big data, parallel computing, benchmarking, PhD life, code snippets, etc., with focus on using R (mainly) and Python.This blog
Steps to host an R-compatible website
- Do your basic homework and go through the R book down documentation, especially the “Recommended Workflow” and “Netlify deployment” sections.
- Buy a domain for your website (I bought mine for 5-years at $10/year).
- Make a new private repo on your GitHub/GitLab account, and clone the repo on your local computer. Let’s call this repo “website”.
- On your local computer, install the R package,
blogdown, andHugo– see full instructions here - Now, choose a theme for your website from Hugo. For academics, the most popular one is Academic because the majority of your site’s content can be written in R Markdown files. There are other themes such as Hugo Hero which utilises Markdown files. Choose carefully, as switching themes later on could be cumbersome. Install the theme in “website”. For
Academic, follow this link - To render your site locally, open any file under “website” in RStudio and go to
Addins -> Server Site. This will render your website onlocalhost, and create a folder calledpublic/with all the HTML files. But you don’t need this folder on your repo, as Netlify will take care of that (see point #7 below). Put the folderpublic/*in .gitignore. Now, commit and push your local changes to your remote repo. - Make a free account on Netlify. To connect your domain and Git repo to Netlify, Follow these steps. Netlify will render your Hugo-based website (from your Git repo) on your domain.
That’s it. You are good to go. If you are confused, the following flowchart will make it easier to connect the dots –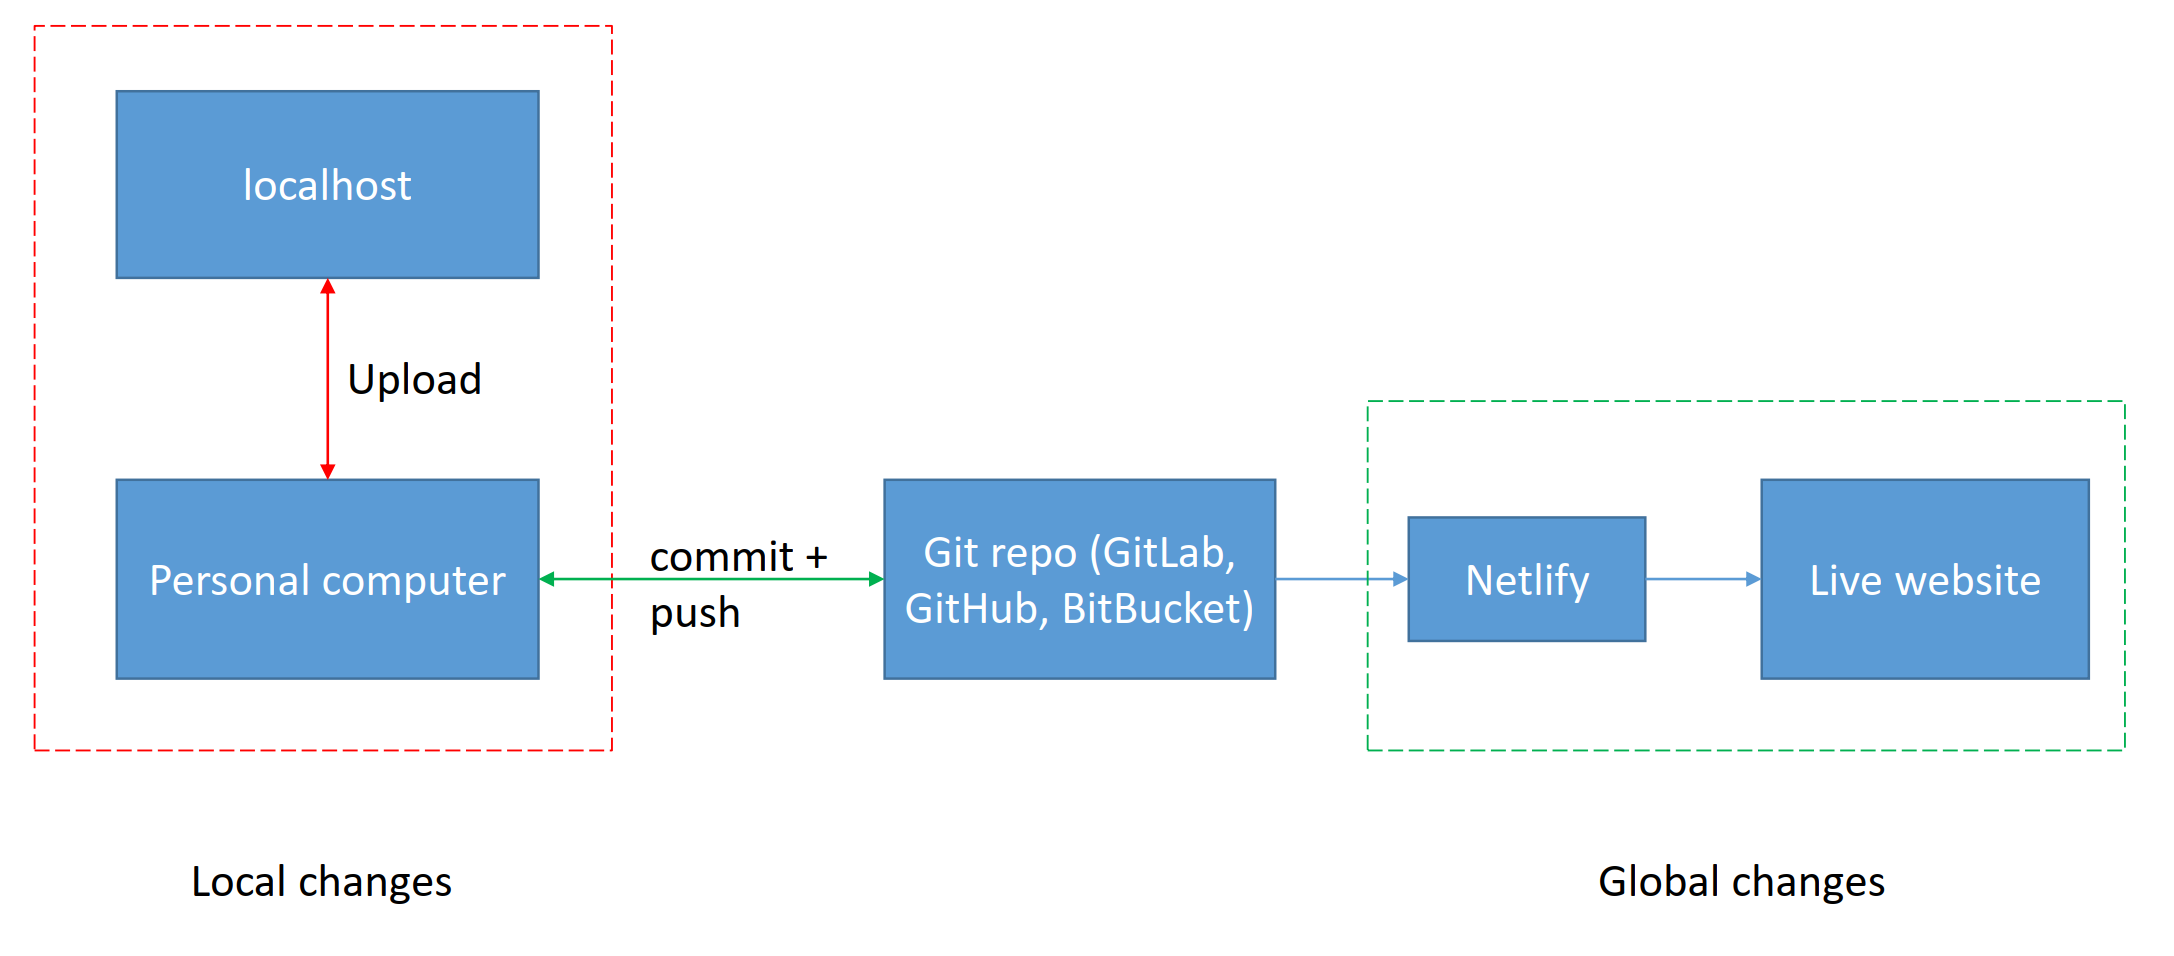
Summary
You can create an RMarkdown blog post on your local GitHub repo, and render your website locally. When you are happy with the post, just commit and push to your remote GitHub repo. Netlify takes care of the rest. That is all you need to publish a post on your website. It can’t get easier than this.
Future Reading
If you like the trio (R + Hugo + Netlify), you can read more on Hugo’s configuration here. Additionally, my Github repo for the website can be found here.